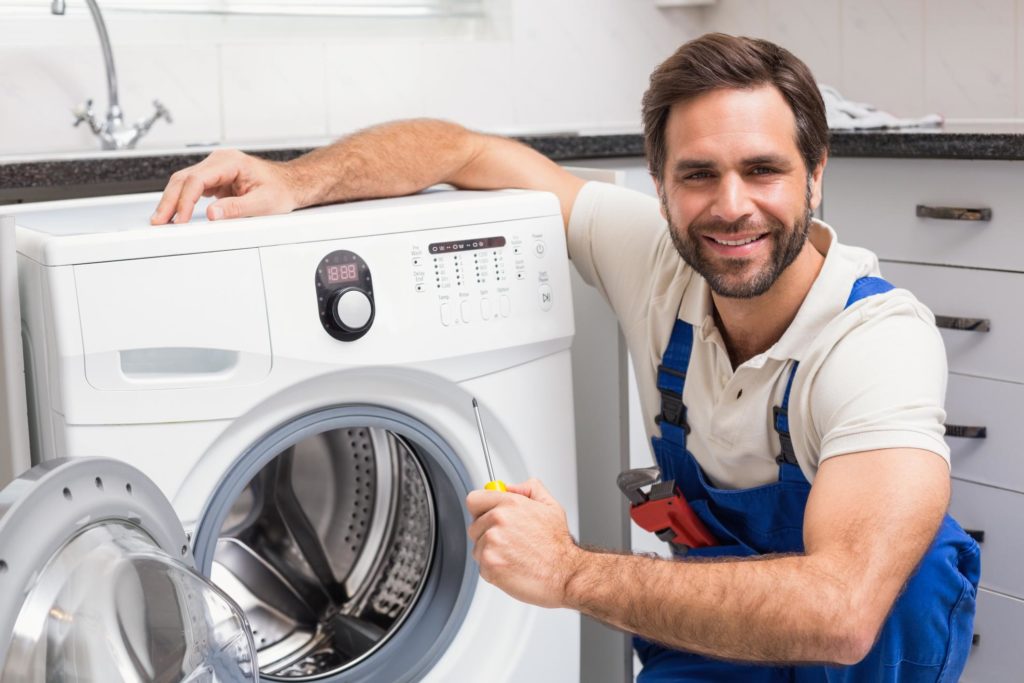
 Washer Repair Introduction Washer and dryer are some of the home appliances that have a preeminent part in our daily life. Washer and dryer are the appliances of the same list but have different work with the logical section. Washer and dryer have the same machine fitted in it that works out and give us dry cloth or may wash the towels. In both appliances a motor fix which start and move based on the belt. In the washer liquid help to wash out the clothes while in the dryer, the machine tends to dry the clothes. This kind of appliances is also called heating appliances, which convert the energy into heat for the working. Like for example, for your understanding, did you ever notice cream maker or electric knives they are all based upon the motor and called motor appliances. Washer and Dryer Repair It is noted that both are motor appliances that convert electric and heat energy into movements used to dry and wash the clothes. It works as same as the power cutter or blender, which grind or cut the food. Now the working of the motor is effortless. It just changes out the electric energy into magnetic energy, which rotates the shaft. At the end of this shaft, a blade or some other attachments actually works. There are several types of motor appliances, the name of them as follows, juicers, coffee grinder, knife sharpener, electric clock, fans, humidifier, and foil head are the basic ones. Importance of Plug and Connector The plug is the only thing that receives power from the wall receptacle. Hence a two-prong cap mostly uses for underground appliances, which are typically 15 amperes or less. Some of the two-prong wires polarized as both wires are connected to each other like one is the hot wire, and the other is neutral. If you notice smaller prong form them symbol the hot wire, and the other one is neutral. Another example is a three-prong wire that has the same sequence of wire just by adding one more that is cold wire. This wire is also less amper and mostly in T shaped with fifteen amp cord and plugged into it. Now, if we talk about the other device used for the repairing of dryer and washer, that is a connector at the end of the cord, where wire connected to the switch or maybe the controller. The cable connects to the solder by a twist on nut or connector. This connector has significant work. It covers the electricity and power source to the appliances. Conclusion The following are the repairing method and the things which may require for repairing the dryer and washer. Sometimes small or large appliances create so much disturbance and mental disorder that makes it difficult for you to improve. Hence, in this case, the only option remains calling the professional who has experience of this work and certified from the sector. But small appliance doesn't make any much headache that is very easy to control and repair your own in your homes. 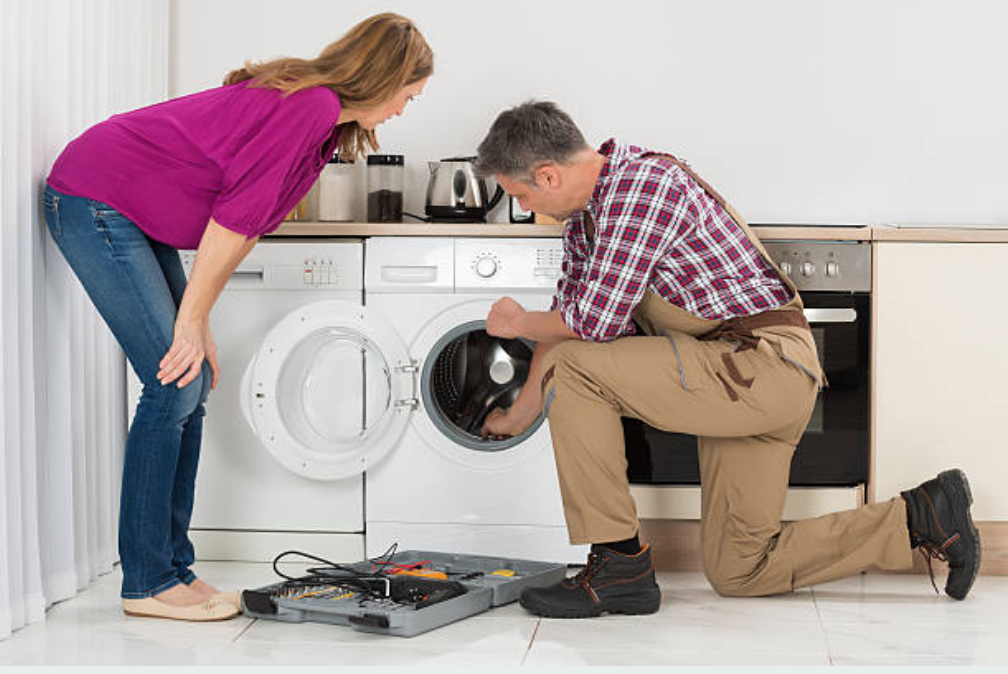 Dryer Repair
2 Comments
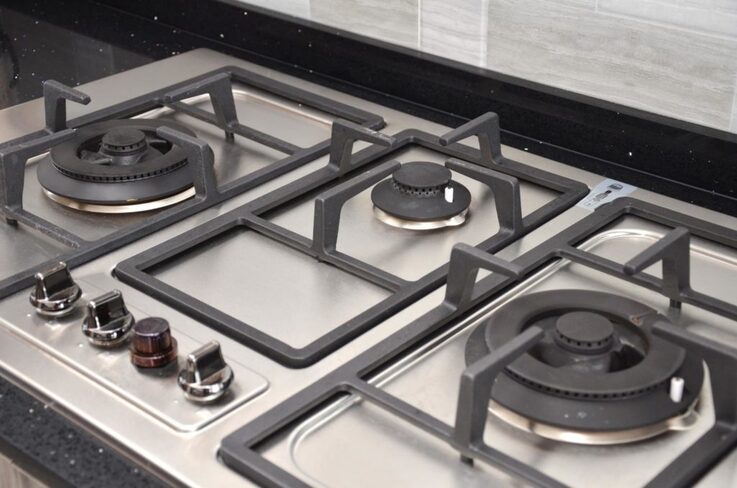 Stove Repair Stove Repair Basics The electric stove is the appliances listed over the large appliances; hence it is relatively simple to use and very easy to repair. The reason is that the stove component is made and stuck in such a way that it can easily be disassembled. Most of the fault that affects the stove consists of the supply of gas in the burner. In the same way in the electric stove, the same error happened due to the heating element, which doesn't clear and gives heat to the tools. So in this article, we take you to know all about the stoves and its functions. Attention: before repairing out the stove either on gas or electricity, it is your first responsibility to unplugged and disconnects the cooker. If you have an electric oven, then cut off the power supply by removing the fuse or tripping the circuit. Disassembly Of The Stove. It is effortless to disassemble the stove. Just follow the steps that are mention below. I. Take the screw, which contains the panels with the help of this pull of the control panel. On the control panel, you see that knob is friction fit. Just pull them straight off. II. some of the knobs are the setscrew using the screwdriver or with the help of wrench for pulling out the knob. III. Now its time to remove the back service panel on the control panel by screws around the board's four edges. For this, take off the control knob and delete the mounting series that holds the decorative panel to the frame. IV. Now gain access to the burners, and for this, remove the grates of burners and then its top range. You have to option to open it either by lifting it or opening it back on hinges. However, doors of the stove directly removed, just pulling them up. V. Replace the burned-out bulb with a new one of the same type because it is essential for you to have the same devices that you remove be attached in this kind of appliances. VI. Let's suppose your stove light is burned out, then unscrew it and remove it from the stove but keep in mind that it has the same wattage and use. Repairing of Stove Step by Step i. First of all, remove out the control knob. ii. After the removing control knob, now lit of service panel and front panel if necessary and hinder in your place. iii. Soon after the control knob removing, testing the control with a volt or ohm meter and checking for the main fault, it has. iv. These are all faults just based upon the management of wires and control terminal that life the out the control of the stove. Conclusion This the main postulates and the things about the stove managements and repairing. Now it's upon you to get it to repair your own or by some professionals. I think it is straightforward to maintain your own in the home as it is not much risk. 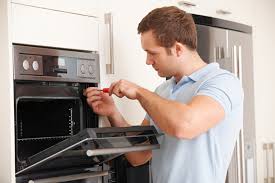 Stove Repairman Amarillo Dryer Repairman Introduction A dryer is a kind of device or home appliance that is shaped like a drum and used to dry the wet laundry we loaded. It consists of a motor with pulleys that are connected to the belts that turn the drum. At the same time, air heated up by the gas from the heating element, which makes your laundry dry. You can easily control out the temperature and the dryer's speed by using a series of thermostats operated from a timer device. For safety purposes, the dryer has a door that switches to activate the working parts. It can not work if the door is opened. Sometime during the running motor get to stop. It is due to overheating when it happens to rest it for 10 minutes. Opening of Dryer The following are the steps involves to open out the dryer if your dryer gets out of order. I. First of all, you have to remove out the back panel, thus for it remove the series of screws and bolts which hold out the board. After that, loose up the nuts while holding the group to the cabinet's top and sides. II. Now more for the lower cabinet of your dryer on the front side. Pull it from the bottom of the office by lifting over the lower panel up and away. After that, remove the springs attached to each side of the lower panel. III. This is the critical step for removing the top panel, its wedge is like bladder, so you have to put a knife under the rim. This knife then releases several springs from the top of the cabinet sides. IV. The last step depends upon the opening of the front control panel with the help of screws. Now screws may be under the part of metal or plastic trim. Cleaning of Dryer Dryer cleans the clothes as dryer itself also needs to clean; otherwise, it blocks the lint traps. So cleaning the dryer is much essential. So for cleaning lint, the screen from the unit. You can remove the filter by pulling it up and out slightly of its housing. The vent is also one of the dryer parts that involves cleaning the lint from the screen. To clean the vent, it-self uses a vent-cleaning brush, mostly available from the hardware store. Repairing of Dryer I. The dryer's drum is out of order, and now you have to fix it yourself then read out the following steps that help you repair the dryer. II. The very first thing is to locate the belt by removing the back or front service panel. III. Prop up the drum to keep it from sagging while don't let the drum hang as if you do this, its cabinet may be damaged. IV. Identify the belt if you want to fix a new one because maybe an old belt threaded the idler pulley and motor shaft. V. If your old belt is worn and not the broken, let it work again and leave it around the drum, otherwise cut the old belt and positioning new. Conclusion These are the main facts and the whole working as well as the dryer repair process. I hope you understand all this. Amarillo Dryer Repair |
AuthorThe author is a digital nomad who has many years in the appliance repair industry. ArchivesCategories |
 RSS Feed